
Crate engine installation checklist: DIY guide

A crate engine installation checklist is a structured, step-by-step verification system covering fitment, system compatibility, mechanical assembly, first-start procedures, and break-in protocols to protect your investment from the first crank. Whether you are swapping a Hyundai G4KE four-cylinder or dropping in a performance-built V8, skipping steps in the engine installation workflow costs time, money, and sometimes the engine itself. This guide gives you every stage in sequence, from measuring the engine bay to completing the break-in period, so nothing gets missed.
1. pre-installation fitment and compatibility checks
The most common installation failures come from missing system-level compatibility checks before the old engine even leaves the bay. Transmission pairing, fuel pressure, electrical grounds, and cooling capacity all need verification before you unbox the crate.
Physical fitment measurements:
- Measure engine bay width, length, and height against the new engine’s dimensions
- Confirm motor mount bolt patterns match the chassis
- Verify bellhousing pattern, flexplate or flywheel compatibility, and torque converter balance
- Check exhaust header clearance against the firewall, steering shaft, and frame rails
- Assess accessory bracket positions for alternator, power steering pump, and air conditioning compressor
System readiness checks:
- Confirm cooling system capacity and radiator flow rate for the new engine’s output
- Identify fuel system type: carburettor or electronic fuel injection (EFI), and verify correct fuel pressure
- Inspect the wiring harness and ECU (engine control unit) for compatibility
- Check battery condition and all earth (ground) connections
- Verify radiator, fan shroud, and water pump cooling system layout before committing to placement
Required tools: engine hoist, load leveller, torque wrench, engine stand, socket set, and a quality multimeter for electrical checks.
Pro Tip: Planning mechanical routing geometry, including steering shaft clearance and header paths, before the engine goes in prevents costly rework after placement.
2. engine bay preparation and old engine removal
Systematic removal of the old engine protects components you will reuse and sets up a clean workspace for the new unit.
- Disconnect the negative battery terminal first, then the positive.
- Drain all fluids: engine oil, coolant, transmission fluid, and power steering fluid into separate labelled containers.
- Label every wiring connector, vacuum line, and hose with masking tape and a marker before disconnecting anything.
- Remove accessories in order: alternator, power steering pump, and air conditioning compressor. Set them aside for transfer to the new engine.
- Disconnect the exhaust at the manifold or header flange and mark the driveshaft orientation before removal.
- Unbolt the transmission if it is being removed with the engine, or support it separately with a transmission jack.
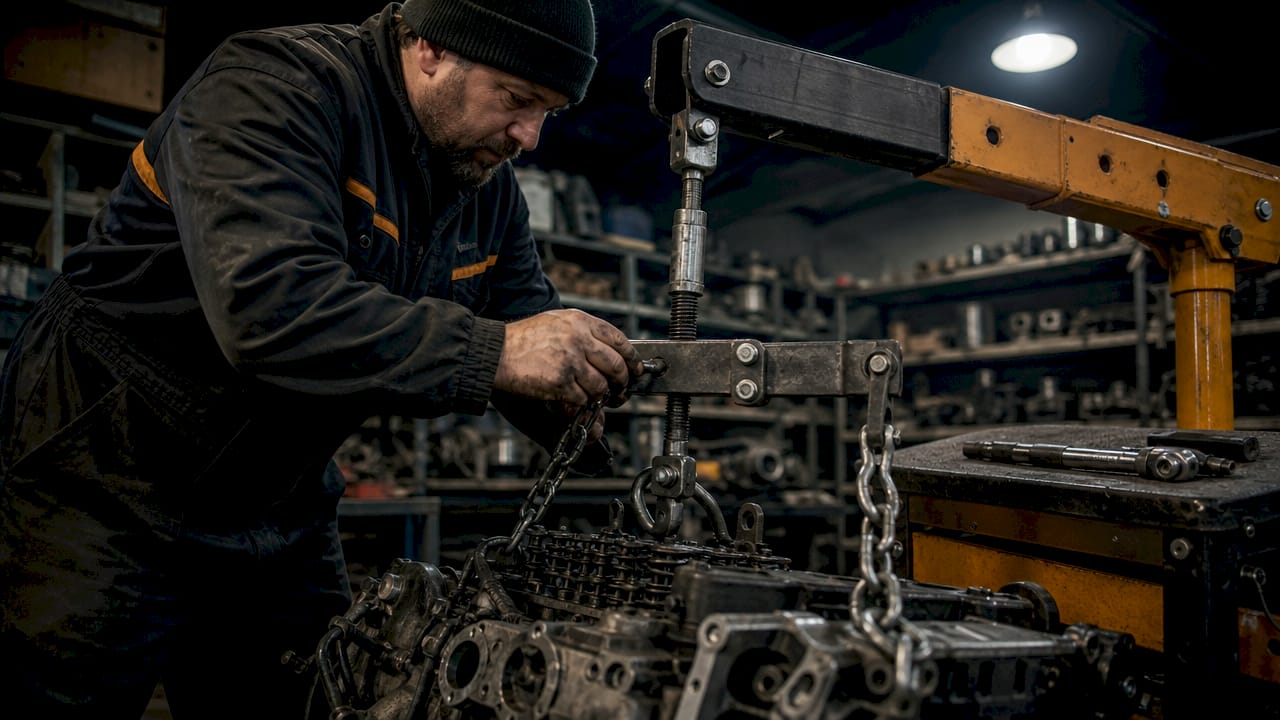
- Attach the engine hoist chains to the factory lifting points and use a load leveller to balance the engine during extraction.
- Lift the old engine slowly, checking for any remaining connections as it rises.
- Once removed, clean the engine bay thoroughly. Inspect mounts, crossmembers, and chassis rails for rust or damage before the new engine goes in.
Pro Tip: Photograph every stage of disassembly on your phone. Those photos are faster to reference than written notes when you are elbow-deep in reassembly.
3. installing the crate engine and aligning drivetrain components
Lowering the new engine is the most satisfying step, but it demands patience. Rushing alignment causes vibration, premature wear, and transmission damage.
Engine placement sequence:
- Install motor mounts onto the new engine loosely. Do not torque them yet.
- Lower the engine slowly with the hoist, using the load leveller to keep it level as it descends into the bay.
- Align the mounts to the chassis brackets by hand before any bolts are tightened.
- Finger-tighten all mount bolts first, then align the transmission input shaft to the bellhousing.
- Once the drivetrain is aligned, torque all mount bolts to the manufacturer’s specification.
System connections:
- Connect fuel lines with the correct fittings for your fuel system type (carburettor or EFI)
- Install the cooling system: radiator, upper and lower hoses, fan, and shroud
- Route exhaust headers or manifolds with clearance checks against the steering shaft and frame
- Attach the wiring harness, reconnect ECU plugs, and secure all earth cables to clean metal
- Check accessory bracket fitment and route the serpentine or V-belt correctly
The table below covers common engine mount styles and their typical fitment considerations:
| Mount Style | Typical Application | Key Fitment Note |
|---|---|---|
| Solid rubber mount | Street builds, standard swaps | Check chassis bracket bolt pattern first |
| Polyurethane mount | Performance street builds | Transmits more vibration to cabin |
| Billet aluminium mount | Race and track builds | Requires precise chassis alignment |
| Hydraulic mount | OEM replacement swaps | Matches factory isolation characteristics |
Confirm steering box and header clearances at this stage. These are the two most common sources of rework on engine swaps.
4. pre-start fluid fill and final checks
Before the key turns, every fluid level and fastener needs a final verification pass. This stage is the last line of defence against a costly first-start failure.
Fill engine oil to the correct level using the grade specified by the engine manufacturer or builder. Fill the cooling system with the correct coolant mix and bleed air from the system by leaving the radiator cap off during the initial fill. Top up transmission fluid, power steering fluid, and brake fluid if disturbed during removal.
Walk around the engine bay and check every clamp, bolt, and electrical connector. A loose earth strap or a forgotten coolant hose clamp will show up immediately at first start, usually in the worst possible way. Confirm the throttle cable or drive-by-wire connector moves freely and returns to idle position without binding.
Check that the engine installation checklist items from the pre-installation stage are all ticked off. Missed steps at this point are far cheaper to fix now than after the engine fires.
5. first start: staged startup and systems check
The first-start procedure is a controlled operation, not a celebration. First-start procedures are staged to build oil pressure before fuel or ignition is introduced, protecting fresh bearing surfaces from a dry start.
- Disable the ignition system (pull the coil fuse or disconnect the coil pack) and crank the engine for 10–15 seconds to prime the oil system and build pressure.
- Restore the ignition system once oil pressure is confirmed on the gauge.
- Have a fire extinguisher within arm’s reach and position an assistant to monitor gauges and watch for leaks while you manage the throttle.
- Start the engine and bring it to a fast idle of 2,000–2,500 RPM immediately. Do not let it sit at low idle on a fresh cam.
- Hold that RPM range for 20–30 minutes, monitoring oil pressure, coolant temperature, and listening for abnormal noises.
- Shut down and inspect every connection, clamp, and gasket surface for leaks while the engine is still warm.
- Re-check all fluid levels after the first heat cycle and retorque accessible fasteners.
Treat this first run as a systems check, not a test drive. Aggressive throttle on a fresh engine before rings and cam lobes are seated causes damage that no amount of break-in will fix later.
6. crate engine break-in procedure: best practices for longevity
The engine break-in procedure is the most misunderstood part of a crate engine swap. Most people treat it as a time limit. It is actually a staged sequence of steps designed to seat the cam lobes, piston rings, and bearing surfaces correctly.
Use the right oil. Break-in oils with ZDDP (zinc dialkyldithiophosphate) additives protect flat-tappet camshafts during the critical first 20–30 minutes of running. Standard modern motor oils often lack sufficient ZDDP for this purpose. Driven Racing Oil BR Break-In Engine Oil is a widely used option for this stage.
Break-in do’s and don’ts:
- Do vary your RPM and throttle load constantly during the first few hundred kilometres
- Do perform a milestone oil and filter change around 800 kilometres (approximately 500 miles) as recommended by most engine builders
- Do allow the engine to reach full operating temperature on every drive
- Don’t cruise at a steady RPM for extended periods. Constant load prevents ring seating and causes cylinder glazing
- Don’t use synthetic oil during the initial break-in period unless the engine builder specifically instructs it
- Don’t use the engine for towing or hard acceleration until the break-in mileage is complete
Varying RPM and load is critical to prevent cylinder glazing and ensure complete ring seating for long engine life. A glazed cylinder bore cannot be fixed without pulling the engine and honing the bores again.
Pro Tip: Plan your break-in drives on roads with varying speed limits and gradients. Hills and speed changes naturally create the RPM and load variation the engine needs.
Key takeaways
A successful crate engine installation depends on thorough pre-installation planning, staged first-start procedures, and a structured break-in sequence to protect the engine from day one.
| Point | Details |
|---|---|
| Fitment checks come first | Verify mounts, bellhousing, cooling, fuel system, and wiring before removing the old engine. |
| Label everything during removal | Photograph and tag every connector and hose to speed up reassembly and reduce errors. |
| Prime oil before first start | Crank without spark or fuel first to build oil pressure and protect fresh bearing surfaces. |
| Hold 2,000–2,500 RPM at startup | Run the engine at fast idle for 20–30 minutes to seat the cam and monitor for leaks. |
| Break-in is a sequence, not a timer | Vary RPM and load, use ZDDP break-in oil, and change oil at the 800-kilometre milestone. |
Why i always start with the routing geometry
Most DIY mechanics I have spoken to focus their pre-install energy on whether the engine physically fits the bay. That is the right instinct, but it misses the detail that causes the most rework. Steering shaft clearance and header path geometry are the two fitment problems that only reveal themselves after the engine is bolted in and you are trying to connect everything else. By then, you are pulling the engine back out.
My advice: before the new engine goes anywhere near the hoist, mock up the header position and trace the steering shaft path with the engine sitting on a stand next to the car. It takes an extra hour and saves a full day of frustration.
The other thing I see overlooked constantly is the first-start procedure. People get excited, the engine fires, and they immediately rev it to hear it run. That first 20–30 minutes at a controlled fast idle is not optional. It is the window where the cam lobes and lifters establish their wear pattern. Blow that window and you are looking at a cam replacement before the engine has done 1,000 kilometres.
If you are new to engine swaps, the engine replacement process guide is worth reading before you start. And if you want to understand what separates a quality crate engine from a rebuild, the new engine vs rebuild comparison lays it out clearly.
The checklist approach works because it removes decision fatigue at the moment you need focus most. Print it, tick it, and trust the process.
— Jason
Engine zone has the engines to back your build
When your checklist is ready and you know exactly what you need, the engine itself has to be right. Engine Zone stocks new, tested, and guaranteed crate engines for Hyundai and Kia vehicles, with fitment assistance and fast delivery across Australia. Every engine comes with transparent pricing and up to 25% off, so your build budget stays intact. Explore the benefits of a new crate engine for your specific project, or use the crate engine selection guide to match the right unit to your vehicle. The team at Engine Zone is ready to confirm fitment before you order.
FAQ
What does a crate engine installation checklist cover?
A crate engine installation checklist covers pre-installation fitment checks, engine bay preparation, mechanical installation steps, first-start procedures, and the break-in period. It is a complete workflow from compatibility verification through to post-installation maintenance milestones.
What is the engine break-in procedure for a crate engine?
The break-in procedure starts with a 20–30 minute cam break-in at 2,000–2,500 RPM, followed by varied RPM and load driving to seat the piston rings, and an oil and filter change at approximately 800 kilometres. Constant steady cruising must be avoided during this period.
Why do you prime the oil system before the first start?
Priming by cranking without spark or fuel builds oil pressure throughout the engine before combustion loads are applied. This protects fresh bearing surfaces from a dry start, which is the most damaging event a new engine can experience.
How long does the crate engine break-in period last?
The break-in period typically runs to the first oil change milestone at around 800 kilometres, but full ring seating can take several thousand kilometres of varied driving. The engine builder’s specific recommendation always takes priority over general guidelines.
What tools do you need for a crate engine installation?
The core tools required are an engine hoist, load leveller, torque wrench, engine stand, socket set, and a multimeter for electrical checks. A transmission jack is also needed if the gearbox is being removed separately during the swap.