
Hyundai engine replacement process explained
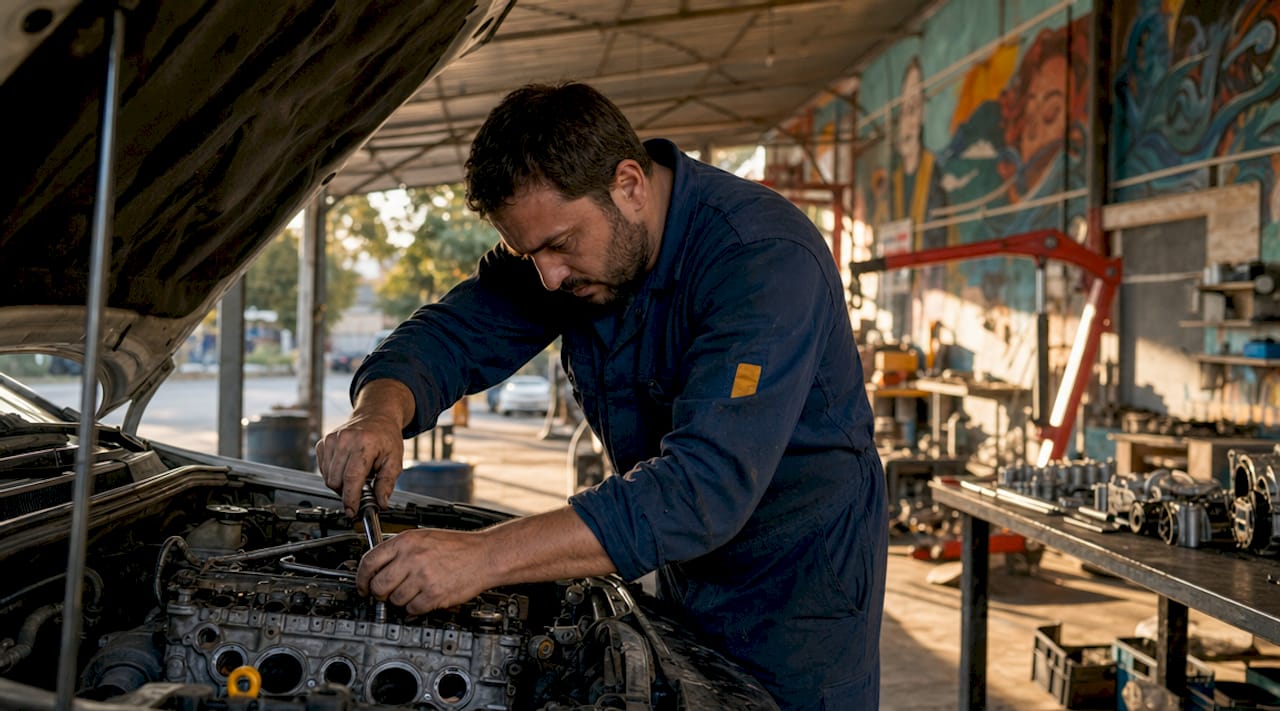
The Hyundai engine replacement process is a structured mechanical procedure covering diagnosis, engine removal, component transfer, and reinstallation, and understanding each stage is what separates a successful repair from an expensive repeat failure. If your Hyundai is producing a metallic knock, burning through oil, or has failed a compression test, you are likely facing a decision between a rebuild and a full engine swap. This guide covers the complete Hyundai engine replacement steps, from identifying the fault through to post-installation testing, with specific attention to the Theta II 2.0L and 2.4L engines that have generated the most replacement work across Australia.
What common problems lead to Hyundai engine replacement?
Rod bearing failure, severe oil consumption, and irreversible cylinder wall damage are the three most common triggers for a full engine replacement in Hyundai vehicles, particularly in Theta II 2.0L and 2.4L engines found in the i40, Sonata, Santa Fe, and Tucson. These are not gradual wear issues you can manage with an oil top-up. They are structural failures that compromise the engine block itself.
The symptoms follow a recognisable pattern. You will hear a metallic knocking sound under load or during cold starts. Oil consumption climbs above one litre per 1,000 kilometres. In advanced cases, the engine may produce blue smoke from the exhaust or trigger a low oil pressure warning. Endoscopic inspection is required to confirm cylinder wall damage, since external symptoms alone cannot distinguish between a worn ring set and a scored bore.
One technical factor that makes the Theta II particularly vulnerable is the absence of piston cooling jets in certain variants. Without jets directing oil at the underside of the pistons, thermal stress accumulates rapidly under hard driving or in high-ambient-temperature conditions like those common across Queensland and Western Australia. Metallic debris in the oil pan and worn bearings cause progressive engine failure, manifesting as rod knock that cannot be reversed by any repair short of a rebuild or replacement.
Pro Tip: Before committing to a replacement, check your VIN against Hyundai Australia’s recall database. Extended warranty and recall programmes cover certain engine repairs or replacements at no cost, depending on eligibility, and this check takes less than five minutes.
Understanding why Hyundai engine lifespan varies across models helps you make a more informed call on whether a replacement is genuinely necessary or whether a targeted repair will suffice.
What tools and parts do you need before starting?
Preparation is where most DIY engine swaps succeed or fail. Arriving at the job without the right equipment adds hours and introduces safety risks. The following covers what you need before touching a single bolt.
Essential tools and safety equipment
- Engine hoist (minimum 1-tonne capacity) and engine stand
- Full socket set including deep sockets, torque wrench, and breaker bar
- Trim removal tools and electrical connector picks
- Coolant drain pan, oil drain pan, and fluid-safe containers
- Jack stands rated for your vehicle’s weight (never rely on a floor jack alone)
- Safety glasses, nitrile gloves, and fire extinguisher rated for chemical fires
- Digital multimeter for electrical checks post-installation
- Workshop manual or OEM technical drawings specific to your Hyundai model and year
Choosing the right replacement engine
The three main options are new crate engines, remanufactured engines, and used engines pulled from low-kilometre wrecks. New crate engines carry the highest upfront cost but arrive tested and guaranteed. Remanufactured units sit in the middle ground, rebuilt to OEM specifications with new bearings, seals, and rings. Used engines carry the most risk unless the seller can verify service history and kilometre count.
Pro Tip: When sourcing a replacement Theta II engine, always confirm with the supplier that the unit includes updated lubrication and cooling revisions. Installing an unrevised engine means you are likely to face the same failure within a similar timeframe.
Consult a Hyundai replacement engine buying guide before purchasing to verify compatibility across engine codes, model years, and transmission types. A mismatch in engine management connectors or accessory mounting points will cost you more time than the price difference between options.
| Replacement type | Cost range (AUD) | Warranty typical | Best suited for |
|---|---|---|---|
| New crate engine | $4,000 to $8,000+ | 12 to 36 months | Long-term reliability priority |
| Remanufactured engine | $2,500 to $5,000 | 12 months | Cost-conscious, quality-focused |
| Used engine (wrecker) | $800 to $2,500 | Nil to 3 months | Short-term budget repair |
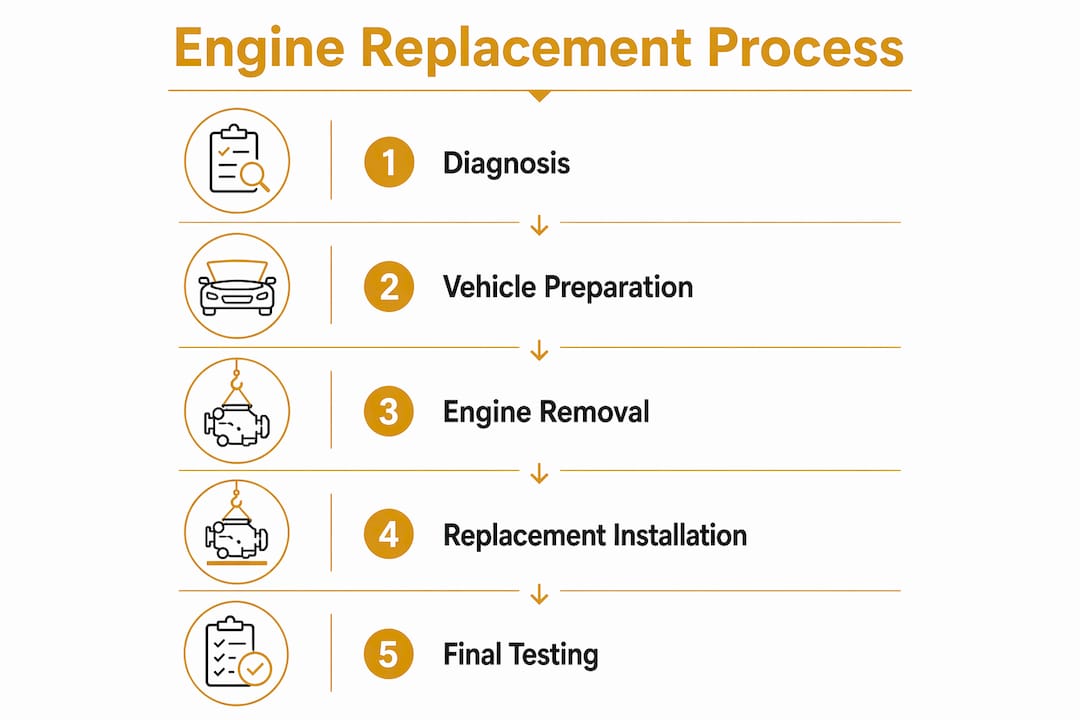
Step-by-step Hyundai engine replacement process explained
The full replacement process from diagnosis to installation can take 10 days or more depending on parts availability and workshop scheduling. For a competent DIY mechanic working on a Hyundai Elantra or Tucson, allow a full weekend minimum for the physical swap, plus additional time for sourcing and testing.
Stage 1: Confirm the diagnosis
- Perform a compression test across all cylinders. A reading below 150 psi in any cylinder, or more than 10% variance between cylinders, confirms internal damage.
- Conduct an oil pressure test at idle and at 2,000 rpm. Low pressure at idle with a knocking sound points directly to bearing failure.
- Use an endoscope through the spark plug ports to visually inspect cylinder walls for scoring.
- Document all fault codes with an OBD-II scanner before beginning disassembly.
Stage 2: Prepare the vehicle and remove the engine
- Disconnect the negative battery terminal first, then the positive. Label every electrical connector you remove with masking tape and a marker.
- Drain the coolant, engine oil, and power steering fluid into separate labelled containers.
- Remove the bonnet for unobstructed access. Two people make this step significantly safer.
- Disconnect the air intake, exhaust manifold, radiator hoses, heater hoses, and fuel lines. Cap all open fuel lines immediately.
- Disconnect the transmission from the engine. On front-wheel-drive Hyundai models, you will need to remove the driveshafts before the engine can be lifted clear.
- Attach the engine hoist to the factory lift points. Confirm the chain angle is balanced before applying load.
- Remove the engine mount bolts and lift the engine clear of the bay. Move it directly to the engine stand.
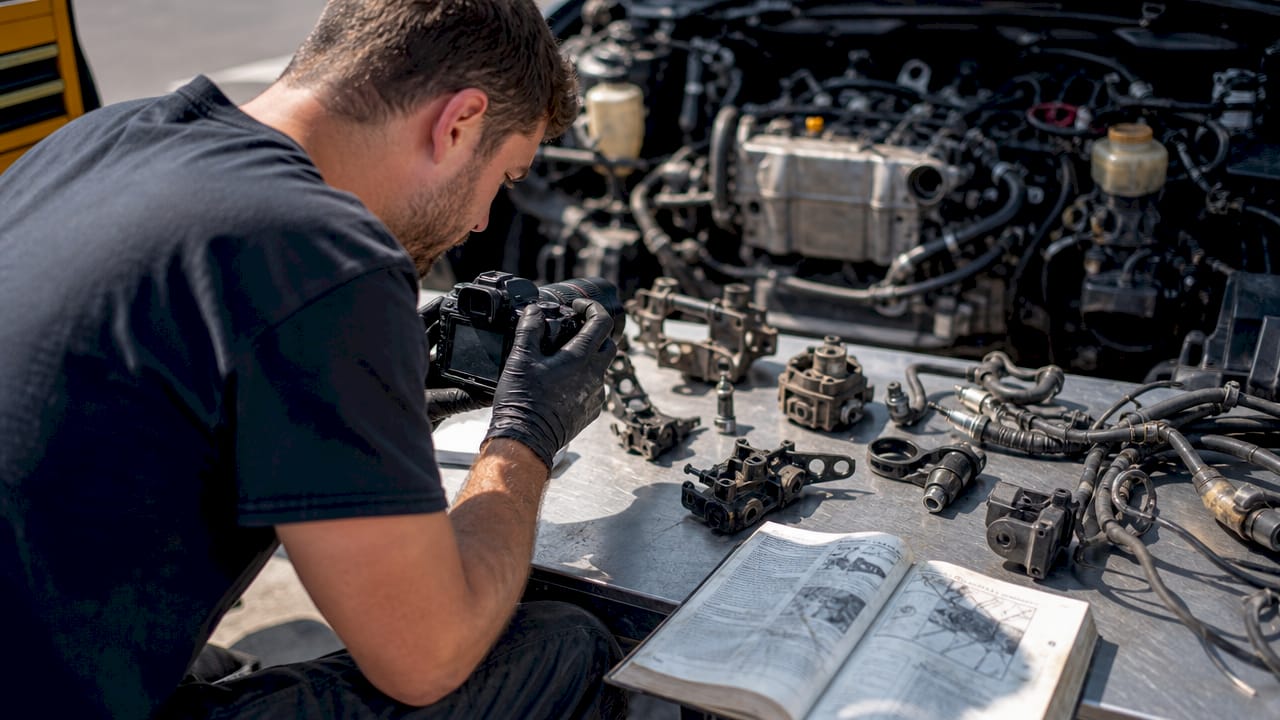
Pro Tip: Photograph every bracket, sensor, and hose position before removal. A phone camera takes seconds and saves hours of guesswork during reinstallation.
Stage 3: Transfer accessories to the replacement engine
Correct sequencing and part compatibility reduce the risk of post-installation issues significantly. Transfer the following components from the old engine to the replacement unit:
- Intake manifold and throttle body
- Exhaust manifold (inspect for cracks before reusing)
- Alternator, power steering pump, and air conditioning compressor
- Engine mounts and brackets
- Sensors including the crankshaft position sensor, camshaft sensor, and knock sensor
- Oil filter housing and dipstick tube
Replace all gaskets, seals, and O-rings during this transfer. Reusing old seals on a new engine is a false economy that leads to oil and coolant leaks within months.
Stage 4: Install and reconnect
- Lower the replacement engine into the bay using the hoist. Align the engine mounts before releasing any load.
- Torque all engine mount bolts to the OEM specification listed in your workshop manual.
- Reconnect the transmission, driveshafts, and all mechanical connections in reverse order of removal.
- Reconnect all electrical connectors, referring to your labelled tape and photographs.
- Reinstall coolant hoses, fuel lines, and the air intake. Fill with fresh coolant and engine oil.
- Reconnect the battery and perform a pre-start electrical check with your multimeter.
- Start the engine and allow it to reach operating temperature. Check for leaks, unusual noises, and warning lights before moving the vehicle.
Common mistakes and how to troubleshoot after installation
Even a well-executed swap can produce issues in the first few days. Knowing what to look for prevents minor problems from becoming major ones.
- Persistent oil leak at the rear main seal: This almost always means the seal was not replaced during the transfer. Drop the transmission and fit a new seal before the leak worsens.
- Coolant loss without visible external leak: Check for a head gasket issue, particularly if the coolant reservoir is bubbling or the exhaust smells sweet.
- Check engine light after installation: Scan for codes immediately. A P0340 or P0335 code points to a camshaft or crankshaft sensor not seated correctly.
- Rough idle or misfires: Confirm all vacuum lines are connected and that no intake manifold gaskets were pinched during installation.
Owners should verify that replacement engines include updated part revisions addressing lubrication and cooling issues to avoid recurring failures. An unrevised Theta II engine installed into the same vehicle will develop the same symptoms under the same conditions.
Repair costs escalate with engine damage severity and may surpass the rebuild cost, making a quality replacement the more sensible option when internal damage is confirmed. If you are seeing persistent knocking after installation, stop driving immediately and recheck bearing clearances before accumulating further kilometres.
Pro Tip: Check your VIN against Hyundai’s recall and warranty campaigns before paying for any replacement work. Many Theta II owners have had engines replaced at no charge under extended warranty programmes.
Key takeaways
A successful Hyundai engine replacement depends on accurate diagnosis, verified replacement engine revisions, and disciplined reinstallation sequencing.
| Point | Details |
|---|---|
| Diagnose before you source | Confirm internal damage via compression test and endoscopic inspection before ordering a replacement engine. |
| Verify Theta II revisions | Always confirm the replacement unit includes updated lubrication and cooling revisions to prevent the same failure recurring. |
| Check recall eligibility | Many Hyundai owners qualify for free engine replacement under extended warranty or recall programmes. |
| Budget for total process time | The full replacement process can take 10 days or more, including parts sourcing, labour, and post-installation testing. |
| Replace all seals and gaskets | Reusing old seals on a new engine causes leaks within months and undoes the value of the replacement. |
What I have learned from watching Theta II swaps go wrong
After years of working with Hyundai engine replacements, the pattern I see most often is not mechanical incompetence. It is impatience. Someone confirms the diagnosis, sources an engine quickly, and rushes the transfer to get the car back on the road. Three months later, they are back with an oil leak at the rear main seal or a coolant weep from a pinched gasket.
The Theta II engine in particular demands respect during a swap. The design history of this engine, including the thermal stress issues from the absent piston cooling jets, means you are not just replacing a mechanical component. You are correcting a known engineering vulnerability. If the replacement engine does not carry the revised parts, you have spent significant money to buy yourself the same problem with a lower odometer reading.
My honest advice is to treat the accessory transfer stage as carefully as the installation itself. Every sensor, every bracket, every seal deserves attention. The certified engine options available in 2026 have improved considerably, with suppliers now specifying revision levels clearly, but you still need to ask the right questions before purchasing.
DIY feasibility depends heavily on your workshop setup. If you have a hoist, a stand, a full socket set, and a workshop manual, a Hyundai Elantra or i30 swap is within reach for a competent home mechanic. A Tucson or Santa Fe with a transverse V6 is a different proposition entirely. Know your limits before you pull the bonnet.
— Jason
Source your next Hyundai engine with confidence
Engine Zone stocks a curated range of Hyundai replacement engines covering the Elantra, Tucson, Santa Fe, i30, i40, and Sonata, with options across new crate, remanufactured, and tested used units. Every engine listing includes model fitment details, revision information, and warranty terms so you know exactly what you are buying before checkout. Engine Zone ships across Australia with free delivery and SSL-secured transactions, and the support team can confirm compatibility for your specific VIN before you order. If you are weighing up your options, the crate engine selection guide walks you through the decision criteria in plain language.
FAQ
What are the most common reasons for Hyundai engine replacement?
Rod bearing failure, oil consumption, and cylinder wall damage are the leading causes, primarily in Theta II 2.0L and 2.4L engines. These failures are structural and cannot be resolved by top-ups or minor repairs.
How long does a Hyundai engine replacement take?
The full process from diagnosis to road-ready can take 10 days or more, accounting for parts sourcing, labour, and post-installation checks. DIY mechanics should allow a minimum of two full days for the physical swap alone.
Can I replace a Hyundai engine myself?
A competent DIY mechanic with an engine hoist, workshop manual, and full tool set can complete a swap on models like the Elantra or i30. More complex platforms like the Santa Fe or Tucson with larger engines are better suited to a professional workshop.
Will my Hyundai warranty cover engine replacement?
Extended warranty and recall programmes cover certain Theta II engine replacements at no cost. Check your VIN against Hyundai Australia’s recall database to confirm eligibility before paying for any repair work.
What should I check when buying a replacement Hyundai engine?
Confirm the engine includes updated lubrication and cooling system revisions, verify the engine code matches your vehicle’s specification, and check that the supplier provides a written warranty covering fitment and performance.